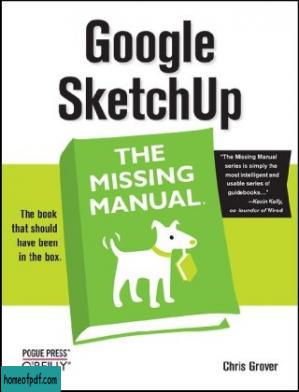
If you want to learn to create 3-D models using Google SketchUp, this Missing Manual is the ideal place to start. Filled with step-by-step tutorials, this entertaining, reader-friendly guide will have you creating detailed 3-D objects, including building plans, furniture, landscaping plans--even characters for computer games--in no time. Google SketchUp: The Missing Manual offers a hands-on tour of the program, with crystal-clear instructions for using every feature and lots of real-world examples to help you pick up the practical skills you need. Learn to use the basic tools, build and animate models, and place your objects in Google Earth. With this book, you will: Learn your way around the SketchUp workspace, and explore the differences between working in 2-D and 3-D Build simple 3-D shapes, save them as reusable components, and use SketchUp`s Outliner to show or hide them as you work Tackle a complicated model building with lots of detail, and discover timesaving tools for using many components Animate the model by creating an interior walkthrough of your building Dress up your model with realistic material shading and shadows, and place it in Google Earth It`s easy to get started. Just download the program from Google.com, and follow the instructions in this book. You`ll become a SketchUp master in a jiffy.Amazon.com Review Google SketchUp simplifies 3-D modelling, is free on the web, and helps you create 3-D models of everything from your garden to a large building. Google SketchUp: The Missing Manual shows you how to make the most of the program`s tools and how to apply them to presentations and online sharing. The book introduces you to 3-D modelling, creating and animating a complicated model building, adding realistic material shading, and placing your model in Google Earth. Using the Push/Pull Tool If you’ve ever seen those camping tents that spring from flat to fully-formed, you have an idea how SketchUp’s Push/Pull tool works. You start with a flat 2D drawing and you stretch it to whatever length you want. Push/Pull works its magic on any shape that forms a face. In these steps, you use the Push/Pull tool to alter a simple box. 1. Use the Rectangle tool to draw a box, and then click the Iso button or choose Camera-->Standard Views-->Iso. You may even want to use the Orbit tool, to get a good view of three faces of the box, as shown below. Each edge on the box has two endpoints and a midpoint. To find the midpoint, move the cursor slowly along the edge. The cursor will snap to the midpoint when it gets close and you see a tool tip that says Midpoint. 2. Select the Rectangle tool and move the cursor over the different faces and points of the box. When the cursor is over a face, a tool tip says “On Face.” When the cursor is over an end point or midpoint, the marker at the tip of the pencil changes color and you see appropriate tool tip messages. In the next step, you use an end point and a midpoint to draw a rectangle on the top surface of the box. 3. With the Rectangle tool, click on the front, right corner and then move to the midpoint on the back of the box, as shown below. After you create the rectangle, your box has an edge down the middle that divides it in half. The top of the box now has two separate faces. Start drawing from the front corner and then stretch the rectangle out to the midpoint on the backside. 4. With the Push/Pull tool (P), click the face on the left and move the mouse forward and backward. As you move the mouse, the model changes shape. When you pull up with the Push/Pull tool, you’re “adding geometry” or “adding volume” to your simple box. When you push it down, you’re “subtracting geometry.” 5. Pull the face up and then click the mouse button. This leaves the face pulled up, and creates a new vertical face in the model. 6. With Push/Pull, push the vertical face back. As you push the face as shown below, you subtract volume from the model, making it smaller. 7. Continue to push the face until you reach the back edge of the box and then click. The face snaps to the back edge and then when you click, the face disappears. Your box looks as it did when you started this exercise. Pushing a face back shrinks an object, sometimes referred to as “removing geometry” or “reducing its volume.” Pushing this face all the way back until it reaches the opposite face removes it entirely.
尊敬的读者:
欢迎您访问我们的网站。本站的初衷是为大家提供一个共享学习资料、交换知识的平台。每位用户都可以将文件上传至网盘并分享。
然而,随着用户上传的资料增多,我们发现部分不宜或版权问题的书籍被分享到了本站。
为此,我们已经关闭了分享入口,并进行了多次书籍审查,但仍有部分内容未能彻底审查到位。
在此,我们恳请广大读者与我们共同监督,如发现任何不宜内容,请 点击此处 进行举报,我们会第一时间处理并下架相关内容。
希望我们能共建一个文明社区!感谢您的理解与支持!


